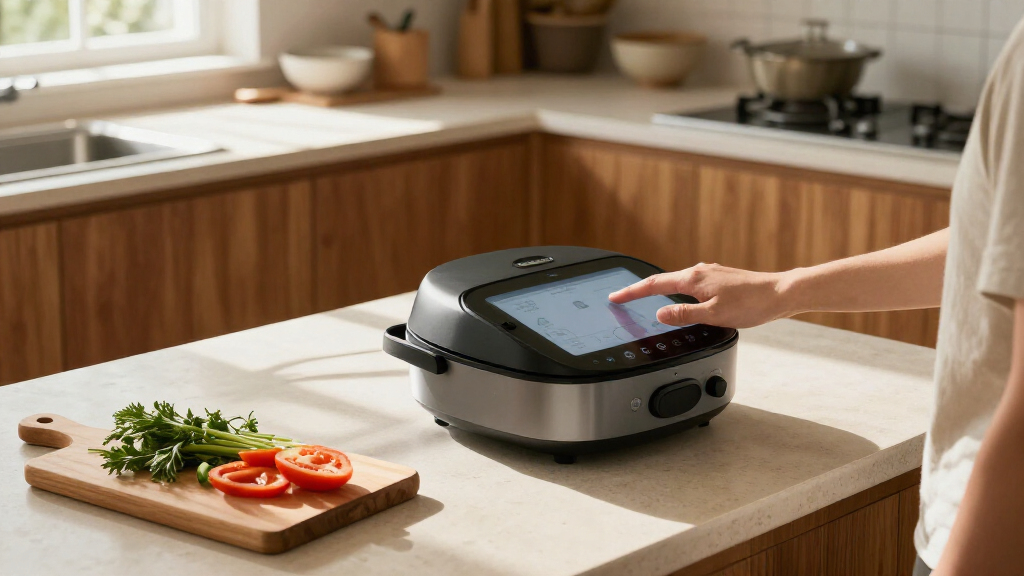
Set up AI-powered kitchen devices to handle tasks such as tracking ingredients, controlling appliances, or suggesting cooking steps. This guide is for beginners who can use a smartphone and home Wi-Fi. You will choose devices that fit your kitchen, connect them, set useful preferences, and test each feature. Allow 45-90 minutes, plus any time needed for installation or software updates.

Get business pricing on tech for your team
- Business-only prices and quantity discounts
- Tax-exempt purchasing
- Multiple users, one account, clear invoices

TOKIT AI Cooking Robot Omni Cook C2 21-in-1 Food Processor
- ✔ Bowl capacity: 2.2 liters
- ✔ Cooking functions: 21
- ✔ Display: 7-inch touchscreen

KAIKAFEI Smart Cooking Robot with Built-In Scale, 3L Bowl, and WiFi Recipe Connectivity
- ✔ Bowl capacity: 3 liters
- ✔ Motor power: 1500W
- ✔ Temperature range: 37–160°C

All-in-One Smart Kitchen Machine with LCD Display, Guided Recipes and Adjustable Temperature (37–160°C)
- ✔ Capacity: 3 liters
- ✔ Power: 1500W
- ✔ Temperature range: 37–160°C
Difficulty: Beginner | Time: 45-90 minutes
What You’ll Need
Tools & Materials:
- Smartphone or tablet
- Reliable home Wi-Fi and its network password
- Manufacturer app for each device
- Compatible smart appliance or kitchen device
- Measuring tape and basic installation tools if required by the device
Knowledge:
- Basic smartphone app use
- Ability to connect a device to Wi-Fi
- Basic familiarity with your household appliances
Check each product’s supported Wi-Fi bands, operating system, and smart-home platform before purchase. Keep model numbers, manuals, and warranty details available. Do not install a device near heat, water, or a power source unless its instructions permit that location.
TOKIT AI Cooking Robot Omni Cook C2 21-in-1 Food Processor
The TOKIT Omni Cook C2 has the strongest automation case in this lineup because its listed capabilities span 21 functions, from chopping and kneading to steaming, emulsifying, and sous-vide cooking. That breadth makes it the most plausible choice for someone trying to consolidate several preparation and cooking steps in one appliance. Its 7-inch touchscreen and stated library of more than 3,000 guided recipes also make the cooking process a central feature rather than an add-on.Compared with the KAIKAFEI machines, TOKIT provides the more substantial stated recipe ecosystem and a built-in scale, but gives up capacity: its bowl holds 2.2 liters, versus 3 liters for either KAIKAFEI. That difference matters if we regularly cook larger batches. It also shares the lineup’s dependence on Wi-Fi for cloud recipes, and the product description flags that software updates or unavailable internet could limit functionality. The appliance is still a sizeable countertop commitment at 14 by 14 inches, so its 21 functions do not make it a space-saving choice in practice.We rank it first for the combination of function breadth, guided recipes, weighing, and self-cleaning. Buyers who mostly want more bowl capacity should look to KAIKAFEI instead; those who want detailed temperature control may prefer the KAIKAFEI model that explicitly specifies a 37–160°C range.
Pros:
- Lists 21 cooking functions, including steaming, kneading, sous-vide, and emulsifying.
- A touchscreen and stated library of over 3,000 guided recipes support step-by-step cooking.
- Built-in scale and self-cleaning mode reduce separate measuring and cleanup work.
- Wi-Fi provides access to the cloud recipe database.
Cons:
- The 2.2-liter bowl is smaller than the 3-liter bowls in both KAIKAFEI options.
- Cloud recipes and software updates may make some functionality dependent on Wi-Fi.
- Its listed dimensions still require a meaningful amount of counter space.
Best for: Cooks who want one appliance to handle a broad range of preparation and cooking tasks with guided recipes and integrated weighing.
Not ideal for: Households that need a larger batch capacity, have limited counter space, or need recipe guidance that works reliably without Wi-Fi.
Bottom line: Choose TOKIT for the broadest stated automation and recipe guidance, provided its smaller bowl and connected features suit your kitchen.
“Choose TOKIT for the broadest stated automation and recipe guidance, provided its smaller bowl and connected features suit your kitchen.”
KAIKAFEI Smart Cooking Robot with Built-In Scale, 3L Bowl, and WiFi Recipe Connectivity
This KAIKAFEI model is the practical choice for cooks who want the machine to help with ingredient preparation as well as cooking. Its built-in scale can keep weighing within the appliance workflow, avoiding an extra kitchen tool between recipe steps. A 3-liter bowl also provides more stated capacity than TOKIT’s 2.2-liter vessel, which makes this a stronger fit for larger batches when the extra volume is useful.Against the other KAIKAFEI option, the defining difference is the scale: both descriptions list a 3-liter bowl, 1500W motor, Wi-Fi recipes, touchscreen, and 37–160°C temperature range, but the LCD model’s supplied details do not mention integrated weighing. The tradeoff is a large footprint of 22.44 by 16.54 by 15.35 inches, matching the other KAIKAFEI. Its recipe guidance also relies on Wi-Fi for full functionality, so it is less suitable for cooks who want an appliance to direct every step offline. A self-cleaning function helps after cooking, but the product details do not specify what components or residues it handles.We place it ahead of the LCD KAIKAFEI for prep automation, while TOKIT remains our overall pick for its explicitly broader 21-function set and larger stated recipe library. Choose this model when integrated weighing and bowl capacity matter more than maximizing the disclosed recipe ecosystem.
Pros:
- Built-in scale integrates ingredient weighing into the machine.
- The 3-liter bowl has more stated capacity than TOKIT’s 2.2-liter bowl.
- Wi-Fi recipe guidance and a touchscreen can support step-led cooking.
- Self-cleaning mode is designed to simplify post-cooking maintenance.
Cons:
- The listed dimensions make it a poor fit for a compact countertop.
- Full recipe functionality depends on Wi-Fi connectivity.
- Its stated function list and recipe library are less detailed than TOKIT’s.
Best for: Busy home cooks who want a larger bowl and built-in weighing to reduce separate measuring steps.
Not ideal for: Buyers with narrow counters or those who need full guided recipe access without a Wi-Fi connection.
Bottom line: Pick this KAIKAFEI when built-in weighing and a larger bowl make everyday prep easier than TOKIT’s broader recipe and function offering.
“Pick this KAIKAFEI when built-in weighing and a larger bowl make everyday prep easier than TOKIT’s broader recipe and function offering.”
All-in-One Smart Kitchen Machine with LCD Display, Guided Recipes and Adjustable Temperature (37–160°C)
The LCD KAIKAFEI makes the most sense for buyers whose priority is controlling heat across varied recipes. Its supplied description specifies a 37–160°C adjustable range, a 1500W motor, and a 3-liter bowl. That gives us a clearer basis for considering gentle heating, everyday cooking, and higher-temperature tasks than the description of a generic all-in-one machine would. The touchscreen and Wi-Fi guided recipes add a step-by-step layer for cooks who prefer prompts to manual settings.It shares its bowl capacity, listed temperature range, touchscreen size, and overall dimensions with the KAIKAFEI scale model. The key distinction is that this product’s supplied details do not list a built-in scale, so buyers who want weighing integrated into the prep flow should choose its sibling. Compared with TOKIT, this KAIKAFEI offers the larger stated bowl and explicit temperature range, but TOKIT supplies a more extensive stated function count and recipe library. The listed 22.44-inch depth and 15.35-inch height also make this machine hard to recommend for kitchens with little free counter space.We give it a distinct role for temperature-led cooking, not because it is described as more capable in every respect, but because its controls and capacity are directly specified. The main compromise is that recipe access depends on Wi-Fi, and the product information does not provide the same integrated scale convenience as the other KAIKAFEI listing.
Pros:
- Specified 37–160°C range gives buyers a clear temperature-control reference.
- The 3-liter bowl offers more stated capacity than TOKIT’s bowl.
- Touchscreen and Wi-Fi guided recipes can help structure multi-step cooking.
- Combines blending, boiling, kneading, steaming, and whisking in one appliance.
Cons:
- No built-in scale is listed in the supplied product details.
- Its large dimensions may overwhelm smaller kitchens.
- Wi-Fi dependence can limit recipe guidance when internet access is unavailable.
Best for: Cooks who want a 3-liter smart machine with a clearly stated adjustable temperature range and guided recipe prompts.
Not ideal for: People who want integrated ingredient weighing, have limited counter depth, or need connected recipes to function offline.
Bottom line: Choose this model for a larger bowl and explicit temperature control, while accepting that weighing and offline guidance are not established strengths.
“Choose this model for a larger bowl and explicit temperature control, while accepting that weighing and offline guidance are not established strengths.”
As an Amazon Associate we earn from qualifying purchases.
Before You Start
Read the installation and safety instructions for each device. AI features differ: some run on the device, while others require an internet connection or account. Check what information the app collects, which permissions it requests, and whether you can turn off voice recording, camera access, or cloud processing. Never rely on an AI recommendation for food safety, allergy decisions, or unattended cooking. Follow appliance manuals and established food safety guidance.
Set aside a clear workspace and make sure the appliances you plan to automate work normally before connecting them. Do not connect a high-power appliance to a smart plug unless both manufacturers explicitly approve that use.
Step-by-Step Instructions
Step 1: Choose one task to automate
Pick a specific kitchen task, such as checking refrigerator contents, setting a cooking timer, or controlling a compatible appliance. List what the device needs to do and where you will use it. Compare products by checking supported appliances, required subscriptions, internet needs, app compatibility, privacy settings, and warranty terms. Start with one device so you can learn its controls before building a larger setup.
Tip: Check the exact model number against the appliance maker’s compatibility list. Similar-looking models may support different features.
Check: You can name the task, the device that will handle it, and any account, subscription, or network requirement.
Step 2: Prepare the location and network
Place the device where its sensors, microphone, camera, or controls can work as intended, following the manual’s clearance and mounting instructions. Keep it away from splashes and hot surfaces unless rated for that environment. Check that Wi-Fi reaches the location by using your phone there. If setup requires a particular Wi-Fi band, confirm that your router provides it and that you know the network password.
Tip: Some devices need a 2.4 GHz Wi-Fi network during setup. Follow the product’s instructions if your router combines network bands under one name.
Check: The device has a suitable location, power source, and a usable Wi-Fi signal.
Step 3: Install the app and prepare the device
Download the manufacturer’s official app from your phone’s app store. Create an account if the device requires one, using a unique password. Plug in or power on the device, then install batteries or attach accessories as directed. Grant only the permissions needed for the features you plan to use. For example, allow camera access only if a camera-based feature needs it.
Tip: Do not share your Wi-Fi password or account credentials with people who do not need access to the device.
Check: The app opens, the device powers on, and any required status light or setup prompt appears.
Step 4: Connect the device to Wi-Fi
Open the app’s add-device or setup option and select the exact product model. Follow the prompts to put the device in pairing mode, choose your home network, and enter its password. Keep your phone close to the device until setup completes. If prompted, allow Bluetooth or local network access during pairing; you can review permissions afterward.
Tip: Enter the Wi-Fi password carefully, including capitalization. A successful connection may take a minute or two.
Check: The app identifies the device as online or connected, and the device no longer shows a pairing indicator.
Step 5: Update and configure the device
Check for firmware updates in the app and install them while the device has stable power and Wi-Fi. Set the correct time zone, units, room name, and household preferences. Add appliance details or ingredient information only when the feature needs them. Review notifications and privacy controls, then turn on only the alerts and data features you plan to use.
Tip: Do not unplug or restart a device during a firmware update unless the manufacturer instructs you to do so.
Check: The app shows the device’s current software status and the settings match your household.
Step 6: Create a simple routine
Use the app to create one routine for your chosen task. Give it a clear name, choose a specific trigger, and set the action. For example, a compatible device might send a reminder at a set time or switch on a supported appliance when you issue a command. Review the routine for unintended actions, especially if it controls heat, blades, or another appliance that can cause harm.
Tip: Start with a reminder or status check before automating an appliance action. Keep safety interlocks and manual controls enabled.
Check: The routine appears in the app with the intended trigger and action, and no unexpected devices are included.
Step 7: Test the features while present
Run the routine while you are in the kitchen and can observe the device. Test voice commands, sensor readings, ingredient recognition, or appliance control one at a time. Compare any temperature or measurement reading with a trusted thermometer or measuring tool. Confirm that manual controls still work. If the device controls an appliance, remain nearby and stop the test if it behaves unexpectedly.
Tip: AI image recognition and ingredient suggestions can be wrong, especially with occluded labels, unusual packaging, or poor lighting. Check results yourself.
Check: Each tested feature responds as expected, readings are plausible, and you can stop or override the device manually.
Step 8: Review access and document the setup
Check the app’s household or sharing settings and remove accounts that should not have access. Save the model number, support contact, and reset instructions somewhere you can find them. Show other household members how to use the manual controls and disable a routine. Revisit the device’s update and privacy settings periodically.
Tip: Tell household members when a device uses a camera or microphone, and agree on when those features should be active.
Check: The intended users can operate and stop the device, and you know how to find its support and reset information.
Common Mistakes to Avoid
- Buying a device that does not work with the appliance, Wi-Fi, or phone. — Check the exact model’s compatibility and network requirements before purchase.
- Giving the app broad permissions without checking why it needs them. — Grant permissions only for features you use, then review them in your phone settings.
- Treating AI recognition or cooking advice as guaranteed accurate. — Verify ingredients, measurements, temperatures, and food safety decisions yourself.
- Automating a heat-producing appliance and leaving it unattended. — Follow the appliance manual, keep safety features enabled, and supervise tests and cooking.
Troubleshooting
Problem: The app cannot find the device during setup.
Solution: Move your phone closer, confirm the device is in pairing mode, and check Bluetooth or local network permissions. Restart setup using the manufacturer’s instructions.
Problem: The device rejects the Wi-Fi connection.
Solution: Re-enter the password, check the supported Wi-Fi band and security settings, and move the device closer to the router. Restart the router only if other devices also have connection trouble.
Problem: A routine runs at the wrong time or does not run.
Solution: Check the time zone, schedule, trigger conditions, and whether the device is online. Save changes, then run a manual test from the app.
Problem: The device gives inaccurate ingredient or sensor results.
Solution: Improve lighting or sensor placement, clean the lens or sensor as instructed, and enter missing details manually. Confirm critical readings with a suitable independent tool.
What Success Looks Like
Your device appears online in its app, has current software and appropriate permissions, and completes the routine you set. You have tested its output while present, confirmed that manual controls work, and know how to stop the device and adjust its settings. AI suggestions are treated as assistance and checked against appliance instructions and food safety practices.
Next Steps
Use the device for a few days and adjust notification timing, routine triggers, or placement if results are inconsistent. Check for software updates and review shared access and permissions from time to time. Add another device only after the first setup works reliably and you have confirmed compatibility with your existing system. Contact the manufacturer if the device overheats, behaves unpredictably, or cannot be made safe using its manual controls.
Frequently Asked Questions
Do AI kitchen devices work without internet access?
Some basic controls may work offline, but cloud-based recognition, recommendations, voice features, or remote access may need internet. Check the device’s manual for its offline functions.
Can an AI device tell me whether food is safe to eat?
Do not rely on image recognition or an AI suggestion to judge food safety. Check storage times and temperatures using reliable food safety guidance, and discard food when its safety is uncertain.
Do I need a smart-home hub?
That depends on the device. Some connect directly to Wi-Fi, while others require a hub or a specific smart-home platform. Confirm the requirement before buying.
Can I automate an oven or cooker?
Only use automation features that the appliance manufacturer supports. Follow the manual, preserve safety locks and shutoff features, and supervise cooking unless the appliance is specifically designed for safe unattended operation.